


Skills
Concepting
Design Thinking
3D Modeling
Rendering
Building/Prototyping
Designing for CNC
Software
Fusion360
Blender
Adobe Illustrator
Adobe Photoshop
VCarve
Deliverables
Functional Final Product
Concept Sketches
Detailed 3D Model
Completed
August 2018
For my internship with SolarMill, as a final project I was tasked with using what I'd learned to create a coat rack that fit the environment of the office, specifically to display above a carved architectural panel, seen below.


Concepting

I selected an option without 3D printed parts, manufactured solely on the CNC and constructed using plywood and joinery.

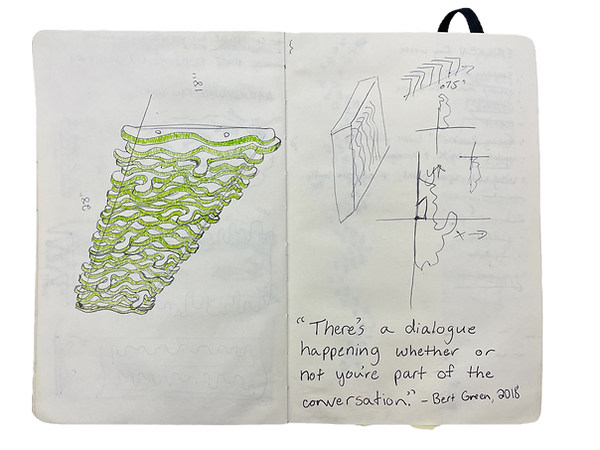
Utilizing my newly acquired skills in Fusion 360, I did the majority of the form refinement within the program, using its unique functions such as parametric modeling and history editing. I wanted multiple wave shapes to be visible in a profile view, and developed a repeating pattern of parts for form cohesion - a method
to the "randomness."

Updated digital sketch 2023

Process

During the modeling process, I had one of those magical moments that proves design to be firmly within the world of art.
When the wavy edges of my model were selected, the selection color used was dark blue. I found the contrast between the warmth of the wood and the deep blue captivating, and resolved to
recreate it in the final build.


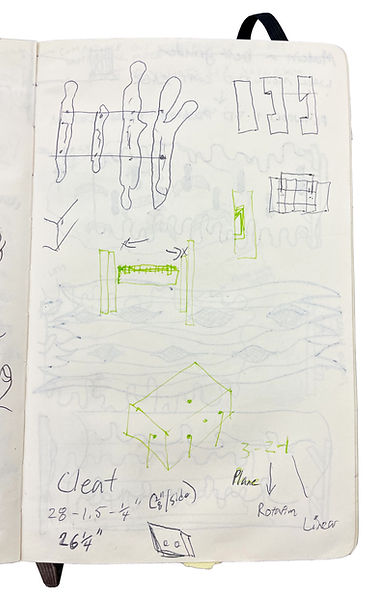
Utilizing VCarve to plot and manage the toolpath, this project was also an exercise in the art of nesting. My final arrangement allows for two full coat racks to be constructed from a single 4' x 8' plywood sheet.


I also considered the issue of identifying the correct order of the pieces once removed from the machine. By including small notches descending across the parts, not only does this identify their order, it allows for ease of assembly using a rig. For the rig, I used a flat board and installed round head screws descending in the corresponding positions.
Construction
The rack is hung on the wall using a french cleat. Because the contact point to the wall anchor would end up only sitting on two pieces due to tolerances, I only added the upper part of the cleat to two pieces. This contact and the contact of the bottom of the piece against the wall created the three points needed for stability. By carving space for the wall cleat behind the piece, I allowed for installation flush to any vertical surface.


To achieve the blue edges, I laid contact paper across the surface of the plywood before machining, and spray painted the pieces after.


On-Site Installation


Rendering work updated in 2023.


